Secure your site for free with Let's Encrypt SSL
security,linux,sslPart 1 of 2
- Secure your site for free with Let's Encrypt SSL
- Let's Encrypt with Docker and Traefik — automatic HTTPS for every service
This is a historical record of the setup I used in 2016 — acme.sh and Apache on Debian Jessie. It worked reliably at the time. For a modern approach using Docker and Traefik, see the followup post.
Before Let's Encrypt, getting a browser-trusted SSL certificate meant paying $50–$300/year to a commercial CA (Comodo, DigiCert, GoDaddy), going through manual identity verification, and configuring renewal yourself. Let's Encrypt launched in 2015, left beta in April 2016, and changed all of that: free Domain Validation certificates, automated issuance via the ACME protocol, and 90-day validity with built-in renewal tooling. For small servers and personal sites that had been running plain HTTP, this was the first practical path to HTTPS.
The official Certbot client wasn't yet packaged for Debian Jessie, so I used one of the alternative clients — a simple bash script: https://github.com/Neilpang/acme.sh
With this script you can get everything done in about 5 minutes.
Prerequisites
- Root access to the server
- Apache running on Debian Jessie
- Domain resolving to the server's public IP
- Port 80 open (used by ACME HTTP-01 challenge to verify domain ownership)
For this guide, assume:
/root/.acme.sh/acme.sh   # where the client scripts live
mysite.com               # the domain you want a certificate for
/mnt/www/mysite.com      # the webroot for your site
/etc/apache2             # Apache installation with config files
Step 1 — Download the client
Go to (or create) /root/.acme.sh/acme.sh and run:
git clone https://github.com/Neilpang/acme.sh
If you don't have git, download the files manually from the project page and unpack them.
Step 2 — Create a symlink for convenience
ln -s /root/.acme.sh/ /etc/apache2/letsencrypt
Step 3 — Issue the certificate
Make sure your site is reachable from the internet, then:
./acme.sh issue /mnt/www/mysite.com/ mysite.com
Or, if you have aliases (e.g. www.mysite.com):
./acme.sh issue /mnt/www/mysite.com/ mysite.com www.mysite.com
acme.sh places a temporary file in the webroot, Let's Encrypt fetches it to verify you control the domain, then issues the certificate. The files are saved to:
/root/.acme.sh/mysite.com/
Step 4 — Configure Apache
Point Apache to the new certificates in your virtual host config:
SSLCACertificateFile  /etc/apache2/letsencrypt/mysite.com/ca.cer
SSLCertificateFile    /etc/apache2/letsencrypt/mysite.com/mysite.com.cer
SSLCertificateKeyFile /etc/apache2/letsencrypt/mysite.com/mysite.com.key
Then reload Apache:
service apache2 reload
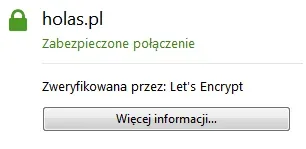
Your site should now be served with a Let's Encrypt certificate.
Step 5 — Auto-renewal
Certificates are valid for 90 days. To renew automatically, create an executable script, e.g. acme_cron:
#!/bin/sh
/root/.acme.sh/acme.sh/acme.sh cron >> /var/log/le-renew.log
service apache2 reload
Drop it in /etc/cron.daily and you're done.
The process isn't complicated — once set up, renewal is fully automatic.
This setup served well until I moved everything to Docker. The modern approach using Traefik handles Let's Encrypt automatically — no scripts, no cron, no manual config. More on that: Let's Encrypt with Docker and Traefik.